With the warm weather just around the corner, there’s no better time to start thinking about building that deck you’ve always wanted. A deck is not just an extension of your home; it’s a space for:
- Family gatherings
- Summer barbecues
- A place to relax and enjoy the outdoors
Building a deck can seem daunting, but with careful planning and the right guidance, you can create a beautiful and functional outdoor space. Let’s walk through how to build a deck, step by step.
Introduction to Deck Building
Building a deck is a rewarding project that adds value to your home both aesthetically and financially. It requires a mix of skills including carpentry, design, and planning. Whether you’re a seasoned DIYer or a homeowner looking to take on your first major project, understanding the basics is crucial to ensuring a successful build.
Why Build a Deck?
- Enhance Outdoor Living Space: A deck is perfect for entertaining guests or enjoying quiet evenings outdoors.
- Increase Property Value: A well-built deck can add significant value to your home.
- Personal Satisfaction: Completing a DIY project of this magnitude offers a sense of pride and accomplishment.
Planning Your Deck

Before you pick up a hammer, you need to plan your deck. This includes choosing the location, size, and style of your deck, as well as ensuring you have the necessary permits and materials.
Step 1: Design and Location
- Choose the Location: Consider views, sunlight, and access from your home. A deck off the kitchen might be ideal for dining, while a deck facing your yard could serve as a lounge area.
- Determine the Size: Think about how you plan to use the space and how many people you expect to accommodate.
- Select a Style: Decide between a platform deck, raised deck, two-story deck, etc., based on your needs and home design.
Step 2: Obtain Permits
Contact your local building department to find out what permits are necessary. Regulations vary by location, and you want to ensure your deck is up to code.
Step 3: Select Materials
Choose high-quality materials to ensure the longevity and durability of your deck. Common choices include:
- Pressure-Treated Wood: Affordable and durable, but requires regular maintenance.
- Composite Decking: Low maintenance and available in a variety of colors and textures.
- Cedar or Redwood: Naturally resistant to rot and insects, but more expensive.
Tools and Materials
Before you start construction, gather the necessary tools and materials:

Tools
- Hammer
- Circular saw
- Power drill
- Post hole digger
- Level
- Measuring tape
- Safety gear (gloves, goggles)
Materials
- Deck boards
- Joists and beams
- Concrete mix
- Deck screws and nails
- Flashing
- Railings
Building Your Deck: 5 Clear Steps
With your plan in place, permits secured, and materials ready, it’s time to start building.
Step 1: Lay the Foundation
- Mark the Layout: Use stakes and string to outline your deck on the ground.
- Dig Footings: Use a post hole digger to create holes for footings, typically 6-8 inches wide and deep enough to reach below the frost line.
- Pour Concrete: Fill the holes with concrete and insert post anchors before it sets.
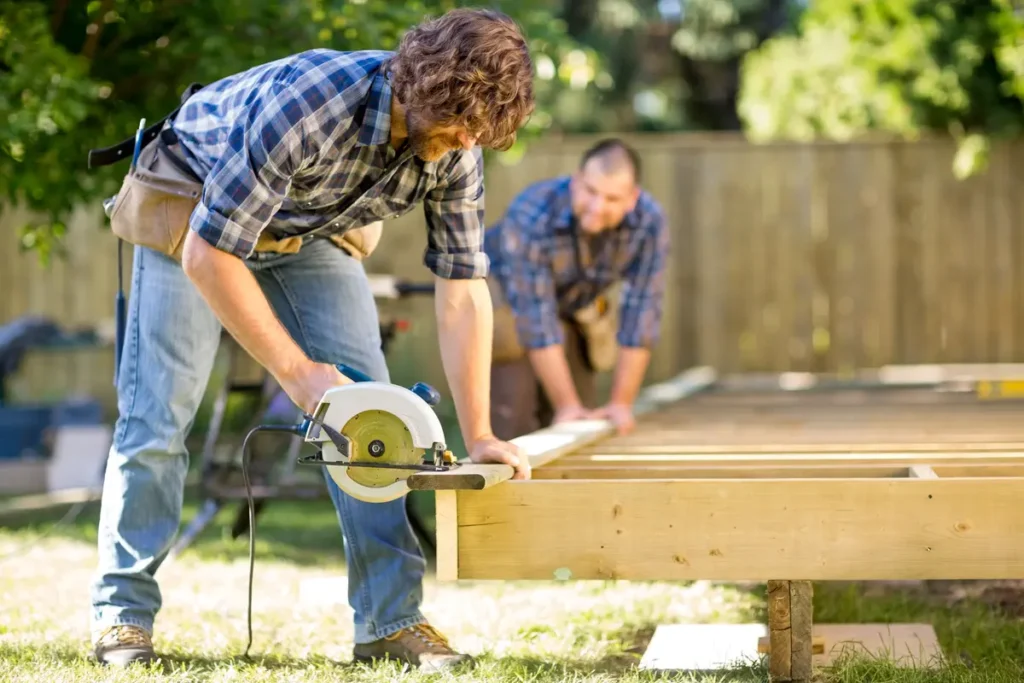
Step 2: Frame the Deck
- Install Posts: Securely place your posts into the anchors.
- Add Beams: Attach beams to posts using metal brackets, ensuring they are level.
- Install Joists: Run joists perpendicular to the beams and secure them with joist hangers.
Step 3: Lay the Decking
- Lay Deck Boards: Start at one end, leaving a small gap between boards for drainage, and secure with screws.
- Cut to Fit: Trim the boards at the edges for a clean finish.
- Sand and Finish: Sand down any rough spots and apply a weather-resistant finish.
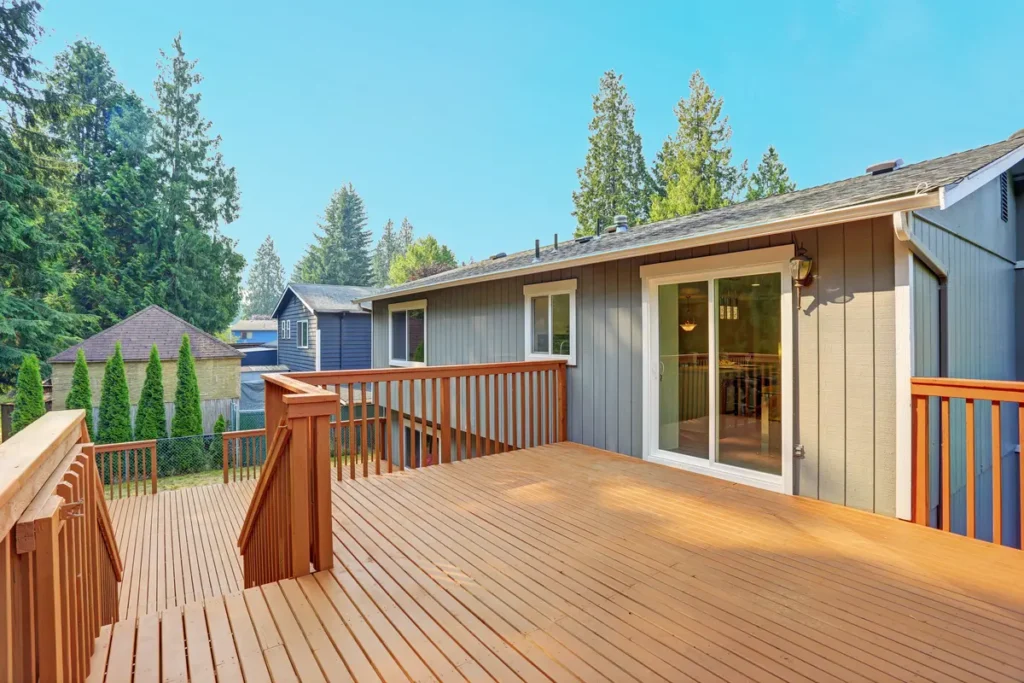
Step 4: Install Railings
- Attach Posts: Secure railing posts to the perimeter of your deck.
- Add Rails and Balusters: Attach horizontal rails between the posts and fit balusters vertically.
Step 5: Final Touches
- Inspect: Ensure all components are secure and check for any areas that may require additional screws or reinforcement.
- Clean Up: Remove any debris and give your deck a good cleaning.
Maintenance and Care
To keep your deck looking its best, regular maintenance is key:
- Cleaning: Sweep regularly and wash with a deck cleaner annually.
- Sealing: Apply a sealant every 1-2 years to prevent water damage.
- Inspect for Damage: Check for loose boards or protruding nails and repair as needed.
Professional Deck Installation
Building a deck is a significant project, but with careful planning and execution, it’s entirely achievable for DIY enthusiasts. Remember to prioritize safety, follow building codes, and take your time to ensure a quality build. Once complete, you’ll have a stunning outdoor space to enjoy for years to come.Ready to get started? If you’ve got questions or need professional advice, don’t hesitate to reach out to the deck-building specialists at Voyager.